Friday, February 24, 2012

The Reveal

 OK here are the results of the snow dying.

I picked up my piles and put them in buckets of water to soak before I remembered to take pictures.   The one at the right was the base fabric before I picked it up.
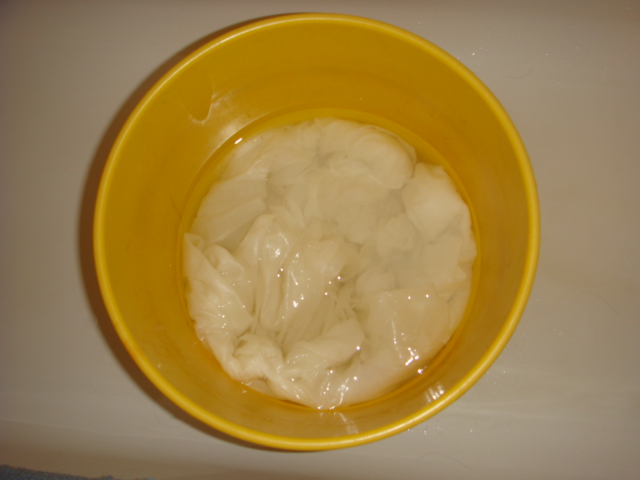
 Here are the colors soaking in cold water.  I do that to help remove some of the excess dye in the fabric.  It saves on water.  Also, our water in the garage has been turned off, so I'm getting the water from an outside faucet.


From here on the fabrics have been washed and washed again in the washing machine until the rinse water is clear.  Then I put all fabric in the dryer along with a large bath towel to dry on permanent press setting.

Here is the silk fabric.  This is the shiny side.  In the center some of the yellow migrated all the way down to the silk, as there is just a bit of green in there.
 This is the dull side of the silk, it shows the pattern better.
This is the bottom fabric, I love how it flows from one color to the next, and how the red makes it all the way to the bottom.
 Here is the blue.I LOVE LOVE LOVE how this came out. The migration of the colors is soooo neat!

However, it's not what I need for the alter.  I am keeping this as it will be great in quilts.
The 2 yards of red came out fabulous.  There are so many shades of red, pink, and orange.  Where did the orange come from?  Maybe some of the yellow migrated up, but I think the yellow came out of the red.  The red that I have is not a primary red.    But all in all I am in love with this fabric.
Here is my yellow.  It too is very interesting and came out quite pastel.  I find the shades of peach so beautiful and delicate.  Obviously the red and a bit of blue migrated to the yellow.

Not what I need for the alter.  But this is a keeper as well.

So you now get the idea that snow dying (or ice dying) is uncontrollable.  You NEVER know what you are going to get.  That is the main thing that makes it so much fun for me.

OK, so now it was back to the dyeing as the blue and yellow needed to be redone.  This time I decided to do it quickly using microwave dying.  Yes I have our old still usable microwave that is dedicated to just this purpose.  The fabrics are in the washing machine now going through their first wash after 2 separate soaks this afternoon. (between the rain storms).  Tomorrow I'll show you those results.

Sew see you later,
Bette

Monday, February 20, 2012

Snow Dying

Finally it snowed last night.  It was so pretty when I got up this morning.  the sun was shinning, there was snow on all the branches of the trees.

This was about 10 AM, the snow was already beginning to melt and was blown off all the trees. By 2 PM our driveway was totally melted.  I was walking around outside with a sweatshirt on.
I decided I better get going if I was going to snow dye.  This may be my only chance this winter.  Here is my fabric soaking in water and soda ash.

For more specific directions go to my Nov  15 2011 post on ice dying.  It's the same except with ice.
I am dying the fabric  for the alter at church for World Day of Prayer.  Since I don't have enough bins to set the fabric on, I'm hoping that putting it on the stone driveway will work just as well.  I'll let you know in a few days.  Here I laid out fabric on the stones.  This was so that if there is any red clay working it's way up to the surface the bottom cloth will be the one to get it.  It will also be the one to kind of soak up the extra dye...????  It worked in the tub anyway. The bundle of cloth furthest away is silk, that's for me.
 Here the piles of cloth are all covered up with packed snow.  Very wet and a little slushy by now.  Being outside it will probably refreeze tonight, then tomorrow thaw out again.
 I've sprinkled procion dye on top of the snow.  About 1 teaspoon of red, about 1/2 teaspoon of  yellow, about the same for the fist lump of blue.  The final one is the silk and I put blue and red over that.
Here it is all covered up with plastic and held down with rocks.  Now comes the HARD part.  WAITING  ... WAITING and WAITING some more.  I found when I did the ice dying, when I left it alone for 48 hours it dyed better than the 24 hours.


I'll see you the end of the week when I have the results!

Thursday, February 16, 2012

Fun with Friends

On Friday February 3, several of us got together at my friend's (Nancy) house.  One of the ladies is quite good at needle felting. She showed us how to make needle felted balls.  We laughed a lot and had a wonderful time together.

Having fun with each other.  


Marcia, our teacher.


Tuesday, February 14, 2012

Happy Valentines Day!

Here is what I did with the Explorers Guild yesterday, and what I did today.

 Yesterday, one of our Explorer members spent years as a pastry chef.  She showed us how to make chocolate plastic (pronounced plas-teek).  Then we got to play with the chocolate.  A close up of the flowers I made are in the next photo.

Today for dessert I made chocolate covered strawberries.  Some of them I rolled in chopped nuts after dipping them.   With the strawberries being marginal in flavor, the chocolate covering REALLY helped.


A close-up of my best flowers.  I'm definitely NOT going to be a person that works with temperamental chocolate.


Hope you all enjoyed your day!

Monday, February 13, 2012

Catch up

Oh it's hard to believe that it is almost the middle of February.  It is way past time to catch you up on what has been happening.

I left my spare camera battery and charger at our daughters over the holidays, so I couldn't take many pictures of how I was doing things.  I tried to use my old camera which worked fine until I couldn't down load the pictures.  The drivers were not compatible with my current computer.  AGHHH!  OK, so in pictures that I have this is some of what I've been up to the last month and a half.


 I made some grocery bags that I can wash and won't fall apart.  I've used them for more than groceries though.  I used fabric that had been given to me last year.  The embroidery designs are from Embroidery Library.  click  here to go to their site.  Then be sure to come back and finish looking at the pictures.

 This one is really cute as it incorporates spools of thread, buttons and scissors in the crown.


Saturday, December 31, 2011

Happy New Year!

 Hope y'all had a safe night and a fun time.  We staid home and laid low, actually fell asleep about 20 minutes before midnight.

Ok now I can show you what I worked on in December.  Well I started typing the first of Nov.  But, after I had typed in 12 pages I did a goof and lost it all.  That is no small feat as I type rather slowly, looking at the keyboard the whole time.  I was making a memory book for our daughter.  About 11-12 years ago she gave us a book of questions about what it was like when we were growing up, and said she would like us to answer the questions.  I'm glad that I sat down at that time to answer most of the questions over a years time.  I kept them thinking I would type the answers up and give them back to her.  This was the year!

After I typed in all of our "stories" , reread them, made adjustments so the pages flowed well, I printed them out.  I was going to "decoupage" them to watercolor paper, so I felt that I needed to get them copied so the ink form our printer wouldn't run.  Now I'm ready to start getting the book together. 

 I took a piece of white muslin, ironed well, and put a coating of gesso on it.  I did some texture in the gesso, but in the end it really didn't show up much.
Here I sprayed purple paint and started to color wash blue.  That's when I found the gesso wasn't dry yet.  This was the hardest part, always letting things dry overnight.
 As you can see I got impatient with the dry in your own time, and tried to speed things along with a hair dryer.
 I lightly numbered my pages so that I could put them back in the correct order.  I had three signatures, using two sheets of watercolor paper folded in half for each signature.

I used water colors to paint the edges of the watercolor paper.


   I used matte gel medium to coat the watercolor pages (one at a time) then put my trimmed typed pages on top.
 Yes I got some bubbles and wrinkles.  So I rolled the paper out using my brayer.  That helped, but in the end some of the pages still had some wrinkles.  I guess that's what makes it special.
Then another coat of matte gel on top of the printed page to seal it.
Drying time again... no short cuts this time.  Overnight was needed here.
 Next day it was on to the back side of each page.  Again I had numbered both the watercolor paper AND the printed pages.  I never would have had them in the correct order if I hadn't done that.

Drying AGAIN.


Back to the cover.  I decoupaged some of the pictures on the cover, along with the title.  Again using matte gel medium.
Here I am stenciling on the cover with Lumiere gold paint.  When that was dry I went over the edges of the stencil with a black gel pen.
 After looking up on the Internet I now knew how to sew the signatures together and bind them into the cover.  Here is the card board (I used left over mat board) I cut to the size needed, a front, back and a spine.
 After trimming the cover to the size needed, I glued it to the cardboard.  Yes it's drying time again!
Here I am sewing the signatures together.  I used strips of silk organza to tie the signatures to the cover.  I tried to use what I had instead of searching for the correct items.   Time was getting short! 
Here I've glued the signatures via the organza strips to the cover.  Properly propping up the signatures until dry... LOL.
 Here I have wrapped the cover fabric over the cardboard on the inside.  Yes drying time AGAIN!


Finally DONE, just in time, the day before we were to leave for our daughters.  PHEW I didn't count on having to wait so long for things to dry!  I was sweating this one.  Yes our daughter LOVED it!

Sunday, December 11, 2011

Jacket and Christmas prep

I've finished my jacket!  It's done!  It looks great!  The picture above was taken this morning in bight sunshine.  Yes they got me with my eyes closed!

Since then, I've made three pair of PJ bottoms to wear Christmas morning.  A pair for Nana, (me), one for Papa, and a pair for our grandson.


I've also been making some Christmas Tree ornaments.  Just a few.  No pictures yet.
  This is going to be a busy week... Explorers on Monday afternoon.  That means I get to go to Lynchburg and I might as well make more stops while I'm there.  So a full in Lynchburg. Tuesday is our Quilt Guild Christmas luncheon and challenge quilt reveal.  Grocery shopping while I'm in the area.  Make the most of the gas in the car while out.  Wednesday is hiking and lunch at The Depot in Lynchburg and at night is family night at church.  Thursday is our morning breakfast group Christmas breakfast.  Phew That's a lot of eating!

In case you don't see me until after the new year, Merry Christmas to all and have a safe and fun holidays.

Sew see you later.
Bette