Saturday, December 31, 2011

Happy New Year!

 Hope y'all had a safe night and a fun time.  We staid home and laid low, actually fell asleep about 20 minutes before midnight.

Ok now I can show you what I worked on in December.  Well I started typing the first of Nov.  But, after I had typed in 12 pages I did a goof and lost it all.  That is no small feat as I type rather slowly, looking at the keyboard the whole time.  I was making a memory book for our daughter.  About 11-12 years ago she gave us a book of questions about what it was like when we were growing up, and said she would like us to answer the questions.  I'm glad that I sat down at that time to answer most of the questions over a years time.  I kept them thinking I would type the answers up and give them back to her.  This was the year!

After I typed in all of our "stories" , reread them, made adjustments so the pages flowed well, I printed them out.  I was going to "decoupage" them to watercolor paper, so I felt that I needed to get them copied so the ink form our printer wouldn't run.  Now I'm ready to start getting the book together. 

 I took a piece of white muslin, ironed well, and put a coating of gesso on it.  I did some texture in the gesso, but in the end it really didn't show up much.
Here I sprayed purple paint and started to color wash blue.  That's when I found the gesso wasn't dry yet.  This was the hardest part, always letting things dry overnight.
 As you can see I got impatient with the dry in your own time, and tried to speed things along with a hair dryer.
 I lightly numbered my pages so that I could put them back in the correct order.  I had three signatures, using two sheets of watercolor paper folded in half for each signature.

I used water colors to paint the edges of the watercolor paper.


   I used matte gel medium to coat the watercolor pages (one at a time) then put my trimmed typed pages on top.
 Yes I got some bubbles and wrinkles.  So I rolled the paper out using my brayer.  That helped, but in the end some of the pages still had some wrinkles.  I guess that's what makes it special.
Then another coat of matte gel on top of the printed page to seal it.
Drying time again... no short cuts this time.  Overnight was needed here.
 Next day it was on to the back side of each page.  Again I had numbered both the watercolor paper AND the printed pages.  I never would have had them in the correct order if I hadn't done that.

Drying AGAIN.


Back to the cover.  I decoupaged some of the pictures on the cover, along with the title.  Again using matte gel medium.
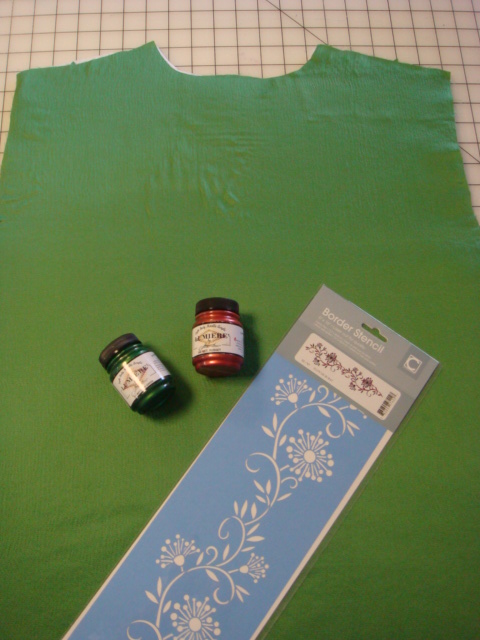
Here I am stenciling on the cover with Lumiere gold paint.  When that was dry I went over the edges of the stencil with a black gel pen.
 After looking up on the Internet I now knew how to sew the signatures together and bind them into the cover.  Here is the card board (I used left over mat board) I cut to the size needed, a front, back and a spine.
 After trimming the cover to the size needed, I glued it to the cardboard.  Yes it's drying time again!
Here I am sewing the signatures together.  I used strips of silk organza to tie the signatures to the cover.  I tried to use what I had instead of searching for the correct items.   Time was getting short! 
Here I've glued the signatures via the organza strips to the cover.  Properly propping up the signatures until dry... LOL.
 Here I have wrapped the cover fabric over the cardboard on the inside.  Yes drying time AGAIN!


Finally DONE, just in time, the day before we were to leave for our daughters.  PHEW I didn't count on having to wait so long for things to dry!  I was sweating this one.  Yes our daughter LOVED it!

Sunday, December 11, 2011

Jacket and Christmas prep

I've finished my jacket!  It's done!  It looks great!  The picture above was taken this morning in bight sunshine.  Yes they got me with my eyes closed!

Since then, I've made three pair of PJ bottoms to wear Christmas morning.  A pair for Nana, (me), one for Papa, and a pair for our grandson.


I've also been making some Christmas Tree ornaments.  Just a few.  No pictures yet.
  This is going to be a busy week... Explorers on Monday afternoon.  That means I get to go to Lynchburg and I might as well make more stops while I'm there.  So a full in Lynchburg. Tuesday is our Quilt Guild Christmas luncheon and challenge quilt reveal.  Grocery shopping while I'm in the area.  Make the most of the gas in the car while out.  Wednesday is hiking and lunch at The Depot in Lynchburg and at night is family night at church.  Thursday is our morning breakfast group Christmas breakfast.  Phew That's a lot of eating!

In case you don't see me until after the new year, Merry Christmas to all and have a safe and fun holidays.

Sew see you later.
Bette


Monday, November 28, 2011

Progress on my coat

Today I spent the afternoon working on my coat.  I feel like I made great strides with it even though a few things went wrong, which meant ripping out seams.

 This is the inside of the front, the bright green and stripe are the side of the pocket that won't be seen.
This is the outside of one of the pockets.  The first one I did I had to take the stitching out and redo it.
 The lining is all sewn together ready to go into the jacket.  Remember the pattern is for a reversible jacket.  I am making it the same but the inside is going to remain the inside.

Here you can see the fusible fleece I attached to the china silk lining.

 Shoulder pads are in place.
 The collar is attached.  The next step is making the buttonholes and finish it with binding all around the edges.  I'll need to line up the lining with the outside before these two steps.
Here is the back with the collar on.  It is finally getting to the end.  It has to, because I have Christmas presents I need to work on.  I'm afraid if I put this aside it will take me forever to complete it.  So the looming presents is good incentive for me to finish it soon!


Sew see you later... Bette 

Sunday, November 20, 2011

Jacket Progress

The last couple of days I've taken a few hours to work on my jacket.  I fused the iron on fleece (batting) to the silk lining.  When I looked at it compared to the jacket, I found that it was boring.  S a day or so later out come my paints and I found a stencil I liked.  I wanted something quick and relatively easy to clean up.  I tried several colors on a piece of scrap fabric.  I liked bright gold the best.  It is a Jacquard Lumiere paint.

The lining back with the stencil I used.
I tried the pouncing and found that didn't work so I swirled the brush
Left front lining painted.

Back painted.  The center bird says One of a Kind and under it I'll put my name and date on it.


 After painting the lining, I stitched the sleeves onto the outside body of the jacket.  The side seams are just pinned to see what it looks like.  This is the front, the pocket pieces are just pinned on.  The pockets will go in next while the jacket is still flat.
This is the back of the jacket.


I'm not sure any more will get done until after Thanksgiving.  I really would like to have it done before Christmas.  At this rate I think I'll make it.

If we get snow this winter I'll be doing some more "ice" dying.  I've got two successful pieces.  It is so easy peasy and fun!  It's like opening up a present because you don't know what you'll get.  A wonderful surprise.

Sew see you later!

Bette


Tuesday, November 15, 2011

ice dying fabric

Sunday afternoon I decided to try dying fabric using the ice dye method. 
1. I soaked my all cotton fabric in a mix of 1 cup of soda ash in 1 gal of hot water, for about 1/2 hour.
2. Wearing rubber gloves, I took the fabric out of the soda ash water and slightly wrung it to get excess water out. 
3. I then folded it in half corner to corner then in half again corner to corner.  I loosely pleated it and put a few rubber bands on to keep the pleats.


4. I then curled it up on the grate which I placed over a plastic wash basin. (to collect all the melted ice/dye)
I quickly learned that the grate let the ice cubes slip through, so I took a piece of plastic screening and laid it on top of the grate.


5. I sprinkled 1/4 teaspoon of the powered procion dye on top of the ice. Remember to wear your face mask.  Here I used brite yellow, Chinese red, and medium brown (from Dharma).


 6. Then comes the hard part... cover it up with plastic and leave it for at least 24 hours.


7. This is what it looked like when I removed the plastic.  I then unbanded it and put it in a bucket of water.  Left it overnight in the water.  Next day I rinsed it til clear water came out and washed it with synthropol.


Here is the result.  I was so happy with it I put another together today.  This time I put a piece of fabric in the bottom of the pan to get a two for 1.


Try it it's easy!  The original instructions are in "Quilting Arts" magazine Sept/Oct issue.

Bette


Friday, November 11, 2011

Friday

The quilting is all done on my round robin quilt.  I wet it to dissolve the wash away basting threads and the blue markings.  Then I placed it on the carpet to block it.  This should really help it because I know it wasn't real square.  It is pinned down to the carpet while it dries.


Whomever invented the bias tape maker was a genius.  What a time saver that is.  On my coat the appliques had 1/2 inch bias tape stitched on the outside to hold them in place.  All of the tan bias tape is now stitched on. 

This is the back with the red bias just sitting there.

Tomorrow is a day in Roanoke with friends.
Sew see you later.   Bette


Thursday, November 10, 2011

Gotta get my coat done!


Last week I went to Mary Joe's Cloth shop in Gastonia NC with 3 friends.  It took about 4 hours to get there, but we had such a good time together it didn't seem like it was that long.  I bought a couple of fabrics for a coat I'm working on.  Then we went to the thread shop and of course bought a few threads I just had to have!


The coat I'm working on will be my winter coat, as I've been wearing a "ski" type jacket for the past oh hmmm maybe 15 years!!!  How can it be that long?  Well I think it is.  I guess I deserve a new coat.  This coat is an artsy kind of coat.
This shows that I cut out little pieces from my fabrics to see if I liked the placement of them.


Since the patterns NEVER fit me there is a fair amount of revising the pattern so that it will come close to fitting me.  I first fit the "lining" as it was one piece in the back and one piece for each front.   then I needed to find all the corresponding pieces of the outside and make the changes to them.  This became a LONG process.  It took me two days just to get the pattern pieces the right size and so they would fit together.   Previously I had pulled out a number of fabric from my stash that went together.  However I was missing a couple and those are the ones I bought at Mary Joe's.   OK so now it is time to cut out the fabric.  I laid all the  pattern pieces for the back on the floor, and laid all the fabric out on the floor.  One by one I picked up the pattern piece and laid it on the correct fabric.  I did the same for each of the fronts.  Then took each fabric and cut it out.  I had to decide how I wanted my stripes to go as well as the nap on the corduroy.  So I didn't always follow the grain line on the pattern.  All this took me a couple of days as well.


cut fabric laid out, didn't like this

This is sewn with newly cut fabric pieces

this is the front, trying out the bias fabric
I didn't like the fabric placement of all of the back pieces, so had to re cut some of the pieces.  Then I found one piece wasn't long enough so had to re cut that one as well.  The back is together, each front piece is together.  I tried out different bias binding on the various appliques and have settled on the same fabric as the applique.  That's where it sits now.  The jacket is supposed to be reversible, but I'm just putting in a lining.  I need to cut and sew that after putting on the bias strips and the sleeves.  I'm hoping I will continue to like it after putting this much time into it.

Round Robin Quilt:
I have two sides of the borders quilted.  I'm getting close to the finish line!

Sew that's it for now!  Bette


Wednesday, October 26, 2011

How Time Flies!

I can't believe my last post was the first week of October and NOW it is the last week of October!  I've got to do better at getting the updates on here sooner.

I've been really busy this month. I 've taken a day trip to Crozet, VA to attend their Fall Art and Craft Festival with some friends.  It was a beautiful fall day.  The art was fabulous.  The company superb!  On the way home we stopped at a "Gourmet" Grocery Store.  They had tons of pumpkins and winter squash outside.  Perfect for picture taking ops.


Again another day trip with friends to Ferrum, VA, the Blue Ridge Folk Life Festival.  Again the day was perfect.  Tons of people there.  We watched mule jumping and coon dog swimming races.  Had a yummy BBQ sandwich and soaked up the sun.

Blue Ridge Folk Life Festival Mule Jumping

Just a portion of people watching Mule Jumping

Corn shucking machine

Coon dog water races


I have continued to work on the round robin quilt.  I've got a little bit left in the 6th block to quilt, then it's on to the borders.


I assembled the last block on the MaKenna Ryan "Beach Walk" quilt.  Now I need to stitch the pieces down, sew the blocks together, then quilt and  bind it.   I plan to have it done by the time our Quilt Guild has our quilt show next year.  That's my plan anyway.

I also finished my second quilt for our guild yearly challenge.  All to be shown at the December QG luncheon.