Tuesday, October 2, 2012

Karen DuMont's Quilt

Last Tuesday I did the workshop at our quilt guild.  Karen DuMont was teaching us the quilt pattern Braid Parade which she designed. ( to see more click here)   Her prairie points are two tone and adorable.  We didn't get much sewn in class but I felt that this would go together fairly quickly so I have been working on it this week.
Here is my progress:


This is the pattern, it uses two jelly rolls or lots and lots of 2 1/2 inch strips.  Since I have plenty of fabric in my stash, I went with that and cut my own strips.
Here are some of my scraps.  I decided to do all batik, and my own hand dyed fabrics.  I have a LARGE jelly roll left of fabric I didn't use, so next time something comes around I'll have it ready.
We are in class with our instructor
Karen DuMont


Karen told us we could lay out the fabric pieces or brown bag them.
For those who do not know... you put all your fabric pieces in a brown bag, then
when you need the next piece you pull blindly from the bag.
My choice was to lay out my pieces.
This is how I have my sewing space set up to sew the braids.
The fabric swatches above each pile correspond
to the swatch that is pinned on each corresponding braid.
 I  quickly learned that I needed to put my piles
on a surface other than the sewing table, as I kept knocking them
off onto the floor, mixing them up.
Here are 8 braids sewn.
They will get trimmed after all the braids are done.

           
Here are two of the inner borders laid out.
I am in process of sewing all 4 inner borders.


Sew see you later,


Bette


Sunday, September 16, 2012

Dragon Boat Races

Well well well.  The Dragon Boat Races came to Smith Mountain Lake!

I was able to sign up for a team of local people, 90% of us had never rowed a dragon boat before.

We had two practice sessions (Wed & Fri) before the races on Saturday.

It takes a lot of effort, muscles, and determination to race these boats.  Would I do it again next time?  You bet I would.  What a wonderful experience.  No, I wouldn't like to train and race these boats on a regular basis.

Below are pictures one of our neighbors took for me using my camera.


Here we are beginning to line up for our first race.  Our team Captain,
Linda Breckenridge is the third from the left.  I'm first on the left.

The boat is loaded.  I'm the second one from the front on the left.  I have my paddle in front of my face.

We are checking the balance of the boat.

We are backing away from the dock.

We are in the green boat, we came in third.

This race took us 1 minute and 6 seconds to complete.  We are now headed back to the dock.

We are preparing to unload the boat.

We raced three heats.  The bad news is we came in third in each heat, the good news is we raced well enough to be in the A division.  The weather was perfect, as it started out sunny to warm the chilly morning air, then the clouds moved in so we didn't bake in the hot sun.  The wind stayed pretty calm until we were almost done.  There were two incidents... luckily it was not our team!  One, after a boat crossed the finish line, they were so happy they were rocking the boat, and a wave came at the same time and swamped them.  Everyone remained calm and staid seated.  The boat floated just below the surface.  Our follow up boat, hooked a line on and pulled them back to the dock.  Then in the last race of the day,  something happened to the steering person in one of the boats and the boat rammed into another boat.  These were the three best teams, and they re-ran the race. 

All in all, I thought for a bunch of people who had never done this before, most of us over 60 years old we did a great job, and had a fun day.

Three cheers to the organizers of this race.  The profits went to Presbyterian Community Center in Roanoke, VA.

Sew see you later,
Bette


Fabric Marbling and Sun Prints


     Last Sunday afternoon I decided to dye some fabric using some new colors I had just received.  I placed an order for procion dye from Dharma Trading (no pictures of those yet).  It was a good day to be out in the garage.  If I hadn't said it before... I do all my dying out in the garage because I am messy.  Spills happen.  When I went out, there was all my stuff for the marbling.  So I decided to do that first.  Here are the pictures.  this time I used my watered down fabric paints.  It gives a softer hand to the fabrics and they are more pastel.  


This was printed on a very pale yellow fabric.

This was printed on white fabric.


I wanted to see what dye would do... hmmm not really happy with it.
Stick to paint.

On Monday, last week, our Explorers group got together and did sun printing using Setacolor paint.
I had forgotten my camera, or I would have posted pictures of us all and our work.  We hd so much fun playing with the paint and making sun prints, that the time just flew by.  Below are the ones I did.  Some more successful than others.  


The objects that didn't print well were 3-D and didn't have a good "footprint".

I used some salt on this one.  The believe and Love are blocks of wood about 1/2 " thick.
Up in the right hand corner, was a stamp I put down of flowers on clear acrylic.  I love the way it came out, but
it was so unexpected that it is so wavy and not a copy of the flowers.  The small flowers and circles
are pre cut self stick foam shapes, and the rose is from a charm.  (no I did not stick the foam shapes on the fabric, I just placed them there.)

Here I hooped the fabric, painted it, put sequins of various shapes on it, then threw on some rice.
We all loved how the rice prints came out.

This had sequin waste, three feathers (one blew off), a brass stencil and salt.

This one was my least successful, for two reasons.  First the colors needed to be more intense, and
second, the materials I put down, artificial greenery, did not lay flat enough.

That's it for now,
Sew see you later.
Bette

Saturday, September 15, 2012

The end of August

Hi All,

Well, the last week and a half of August our grandson spent with us without parents.  He is 7 years old and did very well.  We had so much fun with him.  Each year we decorate a tee shirt during his visit.  This year we did marbling using shaving cream.  That was fun!  Even just playing in the shaving cream was fun for him. (Me too)  We were having such a good time I forgot to take a lot of pictures.  I do have some.

Please forgive the pictures being out of order.  I have spent hours trying to get them in the order I want with no luck.

Here our grandson is filling in the cookie sheet with shaving cream.

After we were done, the fabric he painted he wanted to turn into a pillow.
Here he is stuffing it.

This is the front side of the pillow.  He was soooo proud of this print.
I was proud of him too.

This is his first tee, and first print.

Next one he mushed the colors together.  Here he is lifting up the shirt.

This was his second print.

We used undiluted fabric paint.  This is what it looked like after we put it on the shaving cream.

This is the one I did, and how it looks after marbling it.  The tee shirt came out looking like this
just in reverse.

This is my fabric print after what was left on the shaving cream after  our grandson's
fabric print.  Remember the pillow above?

We had lots of fun doing this project together.  So much fun that in Sept I did some more prints.  See the next post.

Sew see you later.

Bette


Saturday, August 25, 2012

What to do what to do????

Our grandson is with us for a week and a half.  (7 yr old)

Today is cloudy and cooler than normal.

Maybe some crafts?

Maybe skating?  tried to do that yesterday but rink was closed.

We'll figure it out.

My projects are on hold until after Labor Day.


Sew see you later

Bette

Wednesday, August 15, 2012

Dyeing continued day 2

This scarf was mostly done on Sunday.  Here you see it with all the wax removed.
I felt it needed some detail as the trees lost some definition as the soy wax
didn't resist as well as I would have liked.

I was reading one of my silk painting books about things that can be added to
the silk fabric to keep it from bleeding when painting it.  There were several things I could use,
the easiest being hair spray.  Imagine that hairspray!!!

Here is a close up.  I used a fine point sharpie marker.
It now needs to be washed again to get the hairspray out.
On Sunday I had begun this scarf by dyeing the edges yellow.
Today I added the wax.  This time I used all paraffin wax.

I mixed up a medium blue with a touch of Turquoise.
 I put the entire scarf in the dye bath and let it sit for almost two hours.

Here it is after rinsing it out until the water was clear.
I need to remove the wax next (another day).
This is what I used to melt my wax.  I keep water in the electric fry pan so that there is
less chance of the wax getting too hot and catching on fire.  The can on the top is a mix of paraffin and soy wax,  same with the one on the right, at the bottom is pure soy wax, and the one on the left is pure paraffin.

The scarf is stretched on a frame.  Putting the wax on the silk.

I was having so much fun batiking I had to start another scarf.
This time I waxed the white scarf with leaves and stems, to be colored later.

I decided to change my color scheme.

     
After rinsing out the scarf.  When dry it will be ready for the second layer of wax.
Ahh yes another day.

Sew see you later,
Bette


Tuesday, August 14, 2012

A little Dyeing

     Last Sunday it was such a beautiful day outside.  Warm low humidity and sunny.  After church I thought what a perfect day to spend in the garage dyeing fabric.  I had put some ideas down on paper a few months ago.  I was going to work on the long thin silk scarves.  However, when I looked in my stash, all I had left were square ones.  OK so lets punt.  I don't have pictures of the final results yet as they are not ready.  I'll get back to finishing them tomorrow.

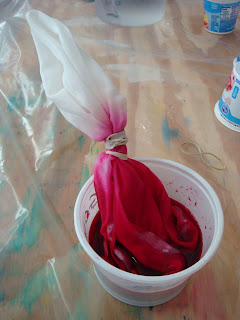
I folded the scarf into quarters and put a rubber band on the lower part
hopefully to keep it from wicking up the color to the center


Mixing up the green procion dye, I feel like a chemist here.

After mixing it, I put a piece of pantyhose over another cup and pour the mixed dye
through it to screen out any bits of unmixed color.

I put the lower part into the green dye and let it sit.

The dye did wick up past the rubber band, but not too far.

After drying the scarf, I stretched it on one of my frames,  here you can see half of the batiking
with wax.  I used a mix of soy wax and paraffin.  

Here it is all waxed and the lower half back in a darker green the upper half in a medium blue


The green didn't come out as dark as I wanted  so I mixed up a darker batch and stuck it in.
This time I left it in the dye for two and a half hours.


This is the beginning of my second scarf.  I didn't get the rubber band as tight
 and the yellow is wicking further up.  That's what I love about dyeing fabric
the way I do it, it is not always predictable.  Yes I do have plastic covering my work surface.  I learned
that when the dye gets onto the wood, if it gets wet it can transfer to the new piece of fabric.  Boo!!
So with the plastic, I keep rags nearby and wipe up drips and spills right away to keep my work surface clean.


Sew See You Later!
Bette